Monday, April 14, 2014

Vacation summary


Yep, I had last week off and spent it up at the farm!  LOL - it was no vacation!

The main reason for taking "vacation" at this time of year was to plant the order of trees and plants that had just arrived for me from the county conservation district group.  The county gets these plants at a discount from local nurseries and then sell them at a discount to people to raise some money for conservationist projects throughout the county.  Anyway, this year I got a "small" order consisting of 6 honeycrisp apple trees, 4 plum trees, 25 elderberry seedlings, 10 blueberry seedlings,  and 12 grape vines.

Blueberries:


I used woodchips to amend the soil and to mulch around the berry plants to keep the weeds down.  I have two of each variety that was available from the county.  To document where I planted each type of blueberry, I took this video:


Elderberries:

Next I planted the elderberries.  I got 25 more this year, more than I really needed to fill the space I have, but they only sell them in packs of 25.   Before I planted the new berry plants I examined last years plants to see if they were alive or dead and needing to be replaced.  While I was checking the plants, I removed the plastic weed protection since it was obvious that the plastic was blocking the berries from spreading.  Elderberries, evidently, send out runners like bamboo and thats how they propagate.  When I was looking under the plastic I noticed many dead branches where the berry plant was unable to get light and died.  So I removed all of the plastic protectors from the old berry plants, noting only one of the old plants showed no sign of life.  I planted most of the new plants near the old plants, filling in where I could.  Then I used wood chips to surround the all of the plants (new and old) to help keep the weeds down (and help me locate them later if the weds grow up too fast for me to keep under control - that happened last year!) .  I had 8 plants left over so I took those and planted them out in the field near a puddly-problem area.  While trying to plant those berry plants, I found out why water puddled there: CLAY!  The puddly area was actually a problem 
because there was only about 2 inches of topsoil on top of almost pure white clay.  I might find a use for that clay later!

Apples & Plums:

Anyway, on to the apples!  I put the honey crisp apples right next to the crabapples that I planted last year. Planting the apples went fairly smoothly.  Just ran the holes with the post-hole-auger on the tractor.  The holes, of course, needed to be widened to accommodate the roots of the trees, but that wasn't too bad.  I dipped the roots in a root-gel mixed with endo/ecto rhizome that I bought just for this purpose.  I highly recommend this for planting new trees and shrubs.  All the trees that I planted last year were dipped in the root gel, and they all survived and flourished.  I plant only bare root transplants, so that gel really helps provide the new trees moisture at a critical time of their development.  I had a couple plum trees that I put in below the peach trees that I planted last year.  I should note that only 2 of the 4 plum trees that I ordered were delivered; the other 2 will be delivered later - or I will get  a refund.   Here are some pics:

Here are the two plum trees.  If the other 2 come in, I will put them to the left of these.

Row of honeycrisp apple trees going down the hill.


View of the apple/pear/peach/plum orchard, as it stands today.
Grape Vines:

The grape vines needed an arbor to support the vines as they mature.  I could have chosen to put the arbors in later, but I wanted to plant the vines in 3 rows of 4, with one row in between the other two rows.  Therefore, putting the arbors in later for that center row would be a problem because digging the post holes with auger would be difficult without risking crushing the grape vine plants.  That would mean  I would have to dig the holes by hand in an area full of mud shale!  Not something I wanted to do.  Therefore, I spent a day and a bit more preparing 5 posts (cutting them to length and stripping the bark off of them), that was a lot of labor!   I also had to re-layout the electric fence around the orchard.  I was able to get a total of 6 of the 15 posts for the arbor up.  At least I got the critical middle row complete, and one more that i needed to hold the solar charger for the fence (its an solar powered electric fence - surprisingly effective!)  Here are some pics:


Here is a video documenting what is planted where (sorry about the sound - it was a breezy day!): 


I took a break of farm planting to head back to the city and plant another raised bed:


Videos describing the raised beds so far: 


Sunday, March 30, 2014

Miscellaneous goings on.. chipping, canning, snowing..


Following on the last post... I did get the chipping done for the debris from the bush trimming.   I didn't take pictures since it just looks the same but with wood chips around the bushes feet!

I finally got around to pressure canning some meat!  I chose venison, since I had a bunch in the freezer that I haven't used as quickly as I thought I would.  The recipe is simple: clean and cook the venison in water, add salt, hot pack in jars, cover with water or broth from cooking (I used both since I ran out of broth), pressure can at 10 lbs pressure for 75 min!  Here are pictures of the results:


I haven't tried any yet because I have plenty of meat already cooked in the fridge.  However, I am curious!  One of these might get opened before too much longer!  I may do more of these if I like them since I have lots of venison in the freezer that I would prefer being in jars on the shelf - especially if we loose power.

Oh, and now this is happening:

My backyard this afternoon, in Silver Spring, Maryland.

See my greenhouse frame on the right?  By this time last year, I had that covered with plants in it getting ready to be put  out in the garden!  ARggggh

Saturday, March 29, 2014

Spring operations starting up!


Finally, the weather is starting to act like Spring!

Vegetable plants

Over the past few weeks I have been getting materials together to plant my trees, grape vines and blueberries which are due in on April 5th.  Last year I bought 139 trees through the yearly county conservation district sales event.  Last year,  I planted 22 apple trees, 4 Asian pears,  6 peaches, 12 cherry, 25 persimmon, 25 paw-paw and 25 elderberries (and 20 spruce trees).   I actually ended up planting 145 trees due to the fact that they put a few extra trees in my order!   It was a lot of work and I vowed that this year I would scale down the order a bit.

So this year, I ordered only 6 apple trees (Honeycrisp!), 3*4 grapevines (12 total), 25 more elderberries and I forget how many blueberries ( 20, I think).  So a total of 63 "tree" plantings coming up next week (well, really the week after).

I did prep one of my gardens with horse manure mulch that I had in my barn.  There is plenty of hay and straw in that barn yet that I want to move out (it's rotting and holding moisture in the barn - it needs to come out!)  Unfortunately, this year has been so snowy and wet so far I can't actually get the tractor into the gardens to work the soil yet.  I do have my seeds started and , in fact, some are ready to go out!  Here are the plants so far:

Cabbages, tomatoes, broccoli, Brussels sprouts, cauliflower, artichoke, onions and eggplants.

The Trim

Yesterday evening I trimmed the bushes around the house.  I had been putting it off the last couple of years so this year they were in horrible shape.  So basically I was forced to do a hatchet job to try to get these beasts back under control.  I had boxwood, yew, azalea and Liliac bushes that all needed cleaning up.   I missed the before pictures, but here are the after pictures:

Our red azalea

Yew, boxwood, Yew, and lilac on far right


Yew

Boxwood

Lilac

Boxwood on left, azalea in front of window.  I plan on taking this azalea and splitting it, since it has two stems coming up out of the ground.
Boxwood by the chimney

The Cuttings

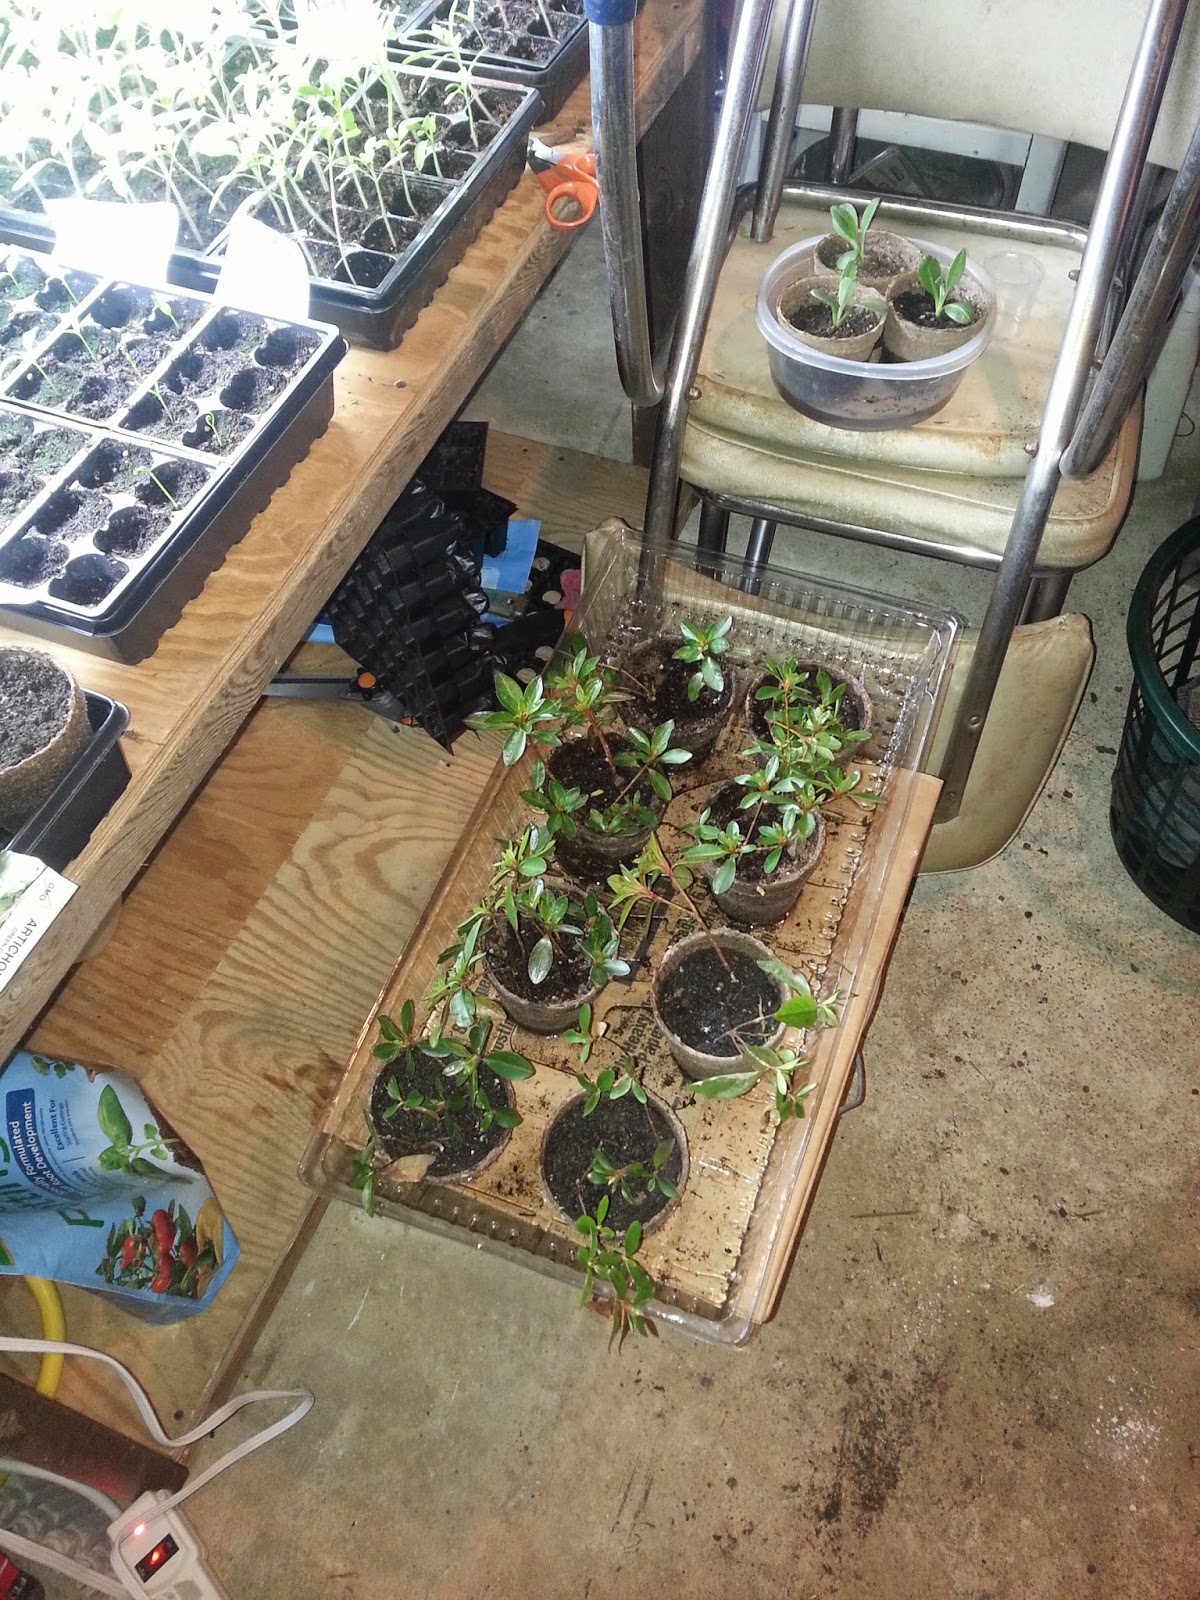
I took some of the azalea cuttings and dipped them in plant hormone and potted them in hopes that roots will sprout and then I can plant these cuttings at the farm (maybe put some more here too!)    The directions on the plant hormone container say that we should see roots in 3-4 weeks.  I am going to do some cuttings of the lilac, another azalea and some forsythia today.

Our red azalea cuttings!


The soup

While I was trimming the bushes, my dear wife, Katherine, was preparing vegetables for a batch of vegetable soup.  I canned some vegetable soup based on the Ball Recipe directions last year.  I like to have this soup around when I am working on the farm so that all I have to do when I come in for a meal is grab a jar and dig in (sometimes I heat it up and add meat and seasonings - sometimes I don't!).   Here is a picture of the 15 pints we canned last night:


Since I have the pressure canner out already, I am tempted to try pressure canning some chicken today!  We will see how it goes.  I still need to chip up the trimmings from last evening and start the cuttings for the other yard plants.  Its raining now, so chipping is not high on my list...


Storm Doors and barn doors...

I haven't updated the blog since last weekend because I have been so busy with work and getting stuff ready for spring.

Last weekend I made it up to the farm and immediately went out to shop.   I wanted to get replacement attic vents for the gables.  The weekend before I had removed the gable vents on my farm house because they were holding many wasp nests and were looking rough.  To counter the wasps, I was just going to put a screen over the front of the gable vents but once I had a closer look at the situation I decided to just tear them completely out and rebuild them.  Anyway, I was looking for replacement vents and thought that since I was out I might as well get the hardware for a new barn door (I had measured and taken pictures of the existing door hardware before I left for the store - it wasn't a spur of the moment decision!)  I have also been thinking of putting a storm door on the front door and replacing the screen door on the kitchen door.  Well, long story short:  I bought all the hardware for the barn door, including the material I needed to build the door, as well as 2 storm doors!

Barn Door

Here are some pictures of the barn door hardware I had to replace and match:

I considered replacing this bracket, but decided against it - this one looks sound and usable. 

It's hard to see from this picture, but the rail/track is bent to the point of being unusable.  Fortunately, only one 10 ft section is all that need replaced.
I also needed to get two brackets to hold the door to run in the tracks.

To build the door, I just found three 12 ft oak boards in my pile of lumber and just quick nailed (using my new battery powered brad nailer!) three pieces of 5/8" thick T1-11 to them:

Here it is laying on the barn floor.  12 foot wide and just over 8 ft tall.  It is not light weight - those three 9x1, 12 ft oak boards are easily as heavy as the T1-11 sheets!
Notice that I extend one of the oak boards about 4 inches below the T1-11 sheets.  This extension is to allow me to attach sacrificial boards to the bottom of the door as these doors often take significant damage on their bottom edges.  
Putting the replacement rail went very smooth.  However, putting the door hardware on was tricky mostly due to the fact that the door is freaking heavy!  While I was out shopping I stopped at Tractor Supply Company and picked up 2 farm jacks (one 48" and one 54") that were on sale ($60 and $70, respectively) because I anticipated this issue.   I used the jacks under the lower edge of the door and jacked the door up the side of the barn until it was positioned close enough to the rail to bolt on the roller/brackets.  That was the plan anyway!  Well, what happened was that while jacking the door up I discovered that the wind had picked up and the door was easily pushed off perpendicular from the jacks - causing the whole door to fall to the ground.  This happened 4 times!  It landed on me the last time!  After that, I kind of lost it and hooked up the UTV to the door and dragged it out in front of the barn where I proceeded to lean the door upright against the solid wall of the barn next to the doorway and then I ran the UTV right up against the door to insure it wouldn't fall on me again!  After using the UTV as an extra brace, I was able to use the jacks again was finally able to get the door bolted on!  Whew!

You can see some dirt that got on the door when I dragged it across the ground using the UTV!

The wood brace at the bottom left of the door is to help keep the door pushed against the building for the night since it was windy and I hadn't yet put any fixtures on the door to latch it down.
Unfortunately, I was so busy last weekend I never got the chance to take a picture of the door after installation of the bottom boards and fixtures.  I will try to add a picture here when I get a chance!  Anyway, the barn is now locked and I feel it's now secure enough to use for storing my tractor attachments and maybe the riding mowers (during the summer months).  In that area, it is probably safe to just leave the barn open with my farm implements inside judging by the fact that most of my neighbors leave theirs visibly open and have even more stuff then I do!  However, they are there on location most of the time and I am only there on the weekends.  This extra security just makes me feel better.

Storm Door

While at Your Building Center (YBC) in Everett PA, I found a nice screen/storm door design that was also quite reasonably priced (some storm doors are more expensive than the entrance doors!).  I got two of these doors, one 35" wide for the front door and one 32" wide for the kitchen door.  The kitchen storm door is a great door, except that it is rusting out and it is no longer able to close correctly.  I may not replace the kitchen door immediately, but the front door desperately needs a storm door!  Here are the doors as purchased and ready to install:

The new kitchen storm door, ready to install.  Maybe later..

The front door storm door is in the box seen on the lower right of the photo.  The front door has never had a storm door and it desperately needs one!  Cold air comes in around that door and the rain sometimes hits the door itself during storms!

Here is the front door before the storm door install:

And here are some pictures after the install:


I have never installed a storm door before, but this was VERY easy!  The hardest part was making sure everything had good clearance and that the latch worked easily.  The storm door installation needs to have a 1"x1" corner on the outside framing of the entrance doorway.  Fortunately, the front door had just that clearance so things worked pretty smoothly.  I looked at the kitchen door storm door installation and can see that the door frame evidently didn't have the necessary clearance and whoever installed that door had to make some adjustments.  Anyway, I am doing that one later... I am actually thinking of replacing the upstairs entrance doors now that I have replaced 3 entrance doors already and really like the way the new doors look.

And finally,..

Ditch digging!

Finally, the weather is starting to allow me to get back to ditch digging!  Late last fall I was working on putting in a drainage tile so that I can get rid of the unsightly (and dangerously placed) downspouts and sump pump outlet pipes.  Here are some before and after pictures for the weekend.  I still have lots of digging to do, but this is a good start!

Before renewed digging this weekend.


After this weekend's digging effort.

This was all done by hand.  I was able to attach the auger to the tractor and drill down a row of holes in lines with where I have to dig in the future.

Monday, March 17, 2014

Milling machine move - part 2

This is a follow on to the previous milling machine post.   Check out the captions on the pictures below.


First brace installed.  I used long deck screws instead of the threaded rod approach  I had planned on.

Second brace installed.


The hoist is in place.  Lift away!

Its off the ground!

A better view.  Only the back is off the ground though...

The front, shown here, is still on the floor!

This shows the removal of the bolts holding the mill to the pallet.

Pallet is separated!

Mill is hanging off the ground, fully supported by the crane!


I put the pipe under the mill and lowered the mill down onto them.

Ready to roll!


Just have to get the crane out of the way now.  This ended up being very difficult because I used long deck screws to attach the braces (oak) to the other pieces (black locust).   They would NOT come out!  I ended up breaking most of the screws off but some would not break so easy.  I had to get out my sawzall and burn a blade on those buggers!  
NOTE TO SELF:  Use the threaded rod approach to attach these braces in the future!  

Freestanding on the rollers!  It look so much smaller without that pallet!  Also, I think that pallet may have added over 200 lbs to the thing!  Very heavy pallet construction and 5/8" steel angle iron braces weigh a lot!

The next step will be to roll the mill into its final resting place. Whew!