Dust room "door"
Before I started any more wood work I wanted to get the door to the dust partition set. I found a neat "zipper" product online, but it wont get here in time, so I just made a temporary door for now. Just a piece of plastic attached above door with a wood strip attached at the bottom to weight it down and closed. Later I intend to tape this door closed and put a zipper door in.
 |
| Not beautiful, but effective enough for now. |
Shop Lights
Since the dust partition blocks the light from the LEDs over the metal tool area, I decided to install the remaining 6 LED lights that I had in the workshop area. This had always been my plan, but now I had to put them up since its so dark now! I had to go out and buy an extension cord and some fixtures to accommodate these lights. A lot of fiddling around, but I got it done. Each of these lights has a single drop down chain/string to turn them on and off. Not my ideal solution, but it gets me up and running this weekend! I need to get this shop rewired sometime.
 |
| I had to put one of these lights above the garage door - above the rafters to avoid getting hit by the garage door. |
 |
| WOW! It sure is a lot lighter in here! |
New workbench base
Since I have decided to build a new workbench base for my new work bench top, I had to find some suitable wood. I went out to the sawmill barn and found some useful lumber.
 |
| Found a 17 ft 5x6 and a 17 ft 4x4. Rough milled oak. |
 |
| Its a bit curvey/warped, but I am using short lengths, on the order of 34" long. |
 |
| Quite a bit of checking at the ends, but I have long enough pieces that I can just cut this off. |
 |
| Cut to length |
 |
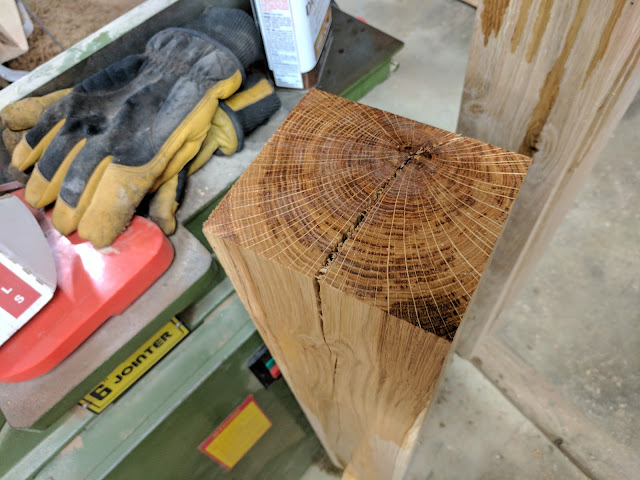
| Jointed and planed to dimension (S4S) |
After having put a couple pieces of end grain material (saw offs from the workbench glueups) and blowing up my planer I noticed that the planer produced these marks on the surface of the boards. I tried eyeballing the cutter heads to look for damage, but I couldn't notice any. So I simply put pieces of wood through the planer and backtracked where on the head the defective cutters must be to produce the defect. I found them and rotated them (I even marked some! sigh - should have marked all of the ones that I rotated) While reseating one of the inserts, it blew up! It literally shattered and threw pieces everywhere! I made sure to turn my head when reseating the rest of the inserts! I got the planer to a point where I couldn't find any more large defects in the resulting boards. Some advise rotating all of the cutters in a row when doing this. I don't know how that helps and seems like you would be wasting a lot of use of the inserts.
 |
| They look ok. But your really can't see the defects with the naked eye I guess. |
Tree layout and planning
While I had already ordered many trees from coldstreamfarm.com, I still needed to complete my orer from the county conservation district. Mostly I was waiting to see how much space my chokecherry and choke berry shrubs would take. It finally stopped raining enough for me to get out and do some layout marking in the field on Saturday (?) It was muddy work, but I got it done. All the new hazelnuts, choke cherries and berries, cherry trees, and a good idea where the apple trees and apricots are going. I think I have all of the trees planned out now - I figured I needed 16(!) sour cherry trees - 3 to replace the ones that died in front and 13 to plant near the barn lane - I will try to keep them "up" out of the wetter spots along there. All in all I am ordering over $1,000 in trees and plants this year!! Its going to be a busy spring planting!


No comments:
Post a Comment