Saturday, April 30, 2016

Rainy weekend. Tree-tube cleanup and machine work.


Mowing - of course!


Just so its recorded, I mowed the front lawn - not around the cherry trees or the persimmons though.


Cleaned up the Paw-paw tubes


In my continuing mission to remove all of the protector tubes from my trees I attacked the paw-paw trees.  Unfortunately, the trees aren't doing as well as I had hoped.  I was only able to remove the tubes off of 6 trees.   Some of the trees are about as big as when I planted them!  ARGG.    Well, at least they are all still alive.  I put cages around the ones that I removed the tubes from.  I don't want to risk deer damage on these poor trees!


Ornamental tree cleanup as well


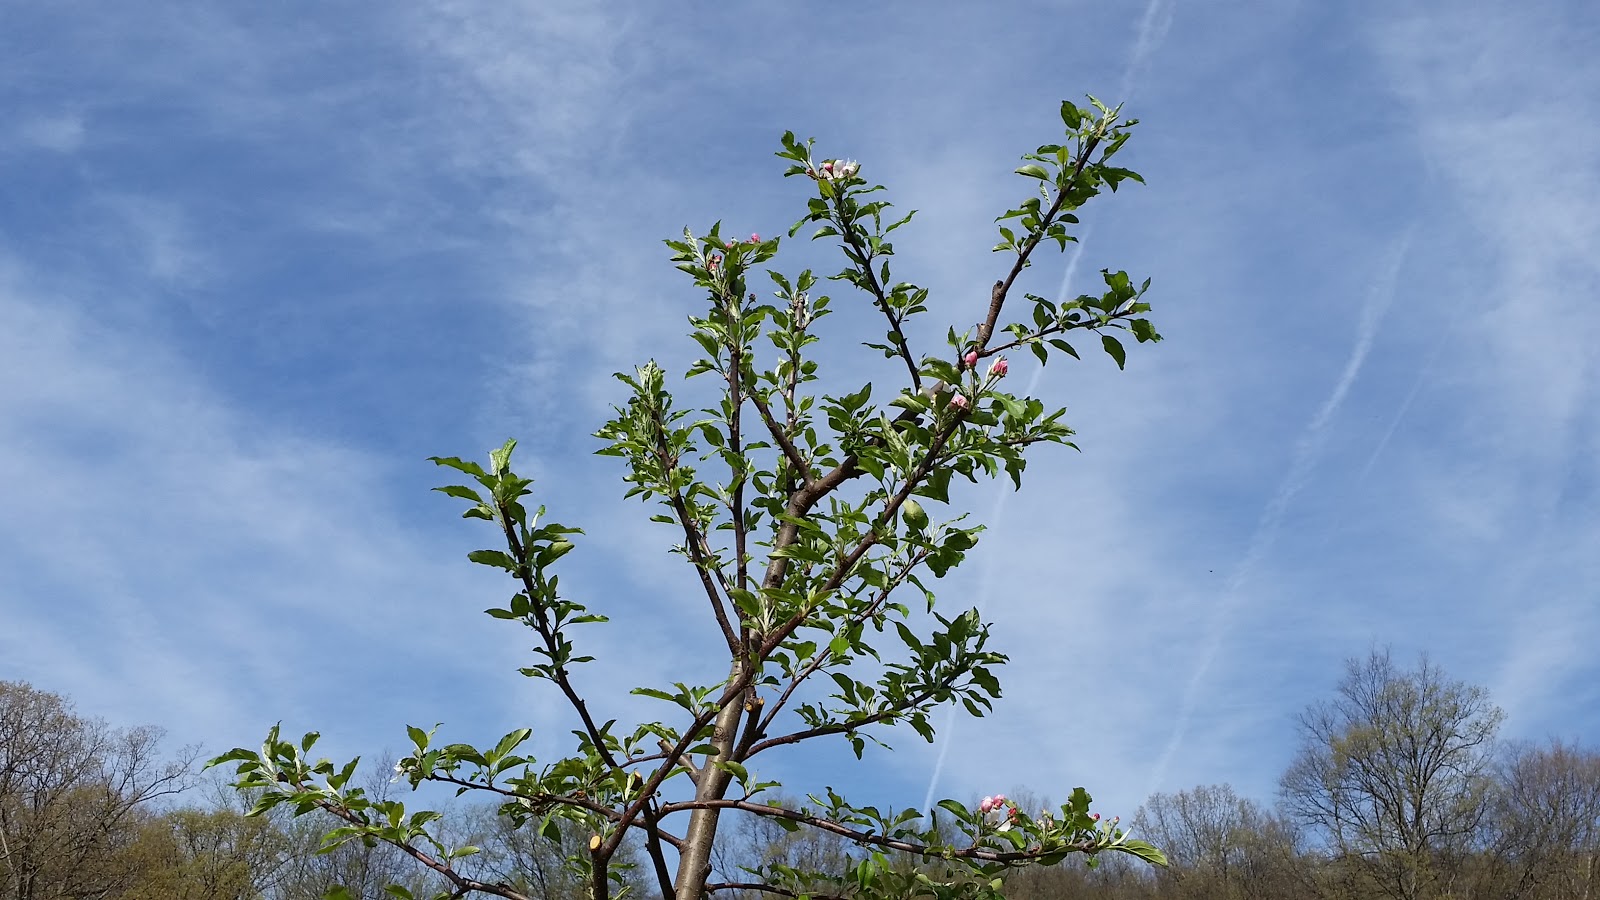
I went ahead and cleaned out the tubes for some of the ornamental trees too.    The two crab-apple trees in the front are doing quite well and are already out!  I took the tubes off of them and replaced them with cages.


I was hoping that the red-bud and dogwood trees were ready to have the tubes removed but alas, not yet.  In fact, the redbuds didn't seem to survive the winter - which is kind of a surprise since they are native in this area too!  The dogwoods seemed to do ok though.   I removed the tubes from the dead redbuds and cleaned and re-set the tubes on the dogwoods.  Some of the dogwoods are a bit rough. We will see how they fair this year.


Started work on my new milling machine arbor


Since it was rainy out and I couldn't mow or do planting, etc. I decided to start working on new milling arbor.   I received a set of gear cutters that need a slightly smaller arbor diameter than what I have, so the new arbor will be sized for them.  The length and shaft of the new arbor will be the same as the arbor I already have, so I just measured that out and began cutting a piece of my alloy steel using my bandsaw!

The existing arbor is model 6-151- style "C" - I actually found it in an old VN brochure!

About 9.25-9.5 inches long

The critical part is the taper insert.  I might try doing a threading on a scrape piece to be sure I get this right!  Oh, and taper too.  I have some mild steel laying around...

The widest diameter is the flange.  I didn't buy a large-enough diameter cylinder to match the original flange but I don't see why my flange has to match  diameter.  As long as there is enough flange to engage the registration tabs - which I am sure it will.


Measuring the actual portion that sticks out of the spindle.  This is the part that will hold the cutters.  I will also have to make spacers for this too since the original arbor spacers will have too large of a inside diameter to fit right.  Oh, will have to make a new arbor nut too!  Joy!  Inside threading on a small ID!

I mounted the cylinder up on the bandsaw and started it up.

It was much slower going than cutting through angle iron

I set it up, started it, and went inside.  I did put a little cutting oil on the cut to start, but I am not sure it was needed.  The chips coming off looked fine.  Didn't seem to get hot at all.  No discoloration of the chips was noticed.  No damage to the blade that I can tell.

The saw finished the cut and turned itself off.  Sweet!  Damn nice cut too.

I missed a few pictures of the drilling the centers (I used the drill press).   I was upset that I didn't have any center finder tools to determine the center points at the ends of the cylinder.  I managed to use the calipers to get the centers and then used a punch to mark the drill centers.  Well, turns out that getting the center drill bit to hit those marks was much more difficult than marking the centers!  I was planning on using the 4-jaw chuck to hold the piece while the other end would be held in tailstock center. However, after trying this approach I quickly determined that the centers where NOT concentric with the outside diameter of the cylinder!  So, I  decided to do the machining between centers using a lathe-dog to drive the head engaging on a jaw of the 3-jaw chuck.  3-jaw chucks do not hold material exactly concentric to the center of the piece, however.  To get around this problem, I used an old trick I learned on youtube!  The trick is to put a sacrificial piece of rod in the 3-jaw chuck and cut the 60 degree center in place.  Since its cut in place, that center WILL be centered on the lathe and will hold the piece perfectly!  Just don't remove the cut center before you are done, otherwise you will have to re-cut the 60 center all over again!

After I got the center ready, I needed a lathe-dog.  I had an old lathe-dog from my small home-made lathe.  I had brought the lathe-dog up to the farm a couple weekends ago.  The drill holes were too far apart so I had to find a new center and recut the clamps on the mill.

Re-cutting some clamp grooves on the old-lathe-dog clamp pieces.  I had to drill and re-tap the holes for the clamps too.

Once I got a couple of longer clamp bolts, the clamp fits nicely and holds well!

The lathe dog arm had to be extended a little bit to engage the chuck jaw.

Here you can see one of the new grooves I cut with the mill.  It could be a wider angle (its only 90 degree) to hold better on this large diameter cylinder, but remember, this cylinder will get turned down to a smaller diameter!  Then this clamp will fit the smaller diameters better.

Once it was mounted up, i took a cut.  Works fine!

the chips come off in long thin razor like strips!  AND, they are damned hot too!

Turned the entire cylinder here.  Should be perfectly centered and concentric at this point.  I should check for "taper", but I have lots of material to remove before that maters much.

See the pretty blue chips?  I made sure the piece had plenty of cutting fluid on it.  The cutting fluid would smoke!  the shop was foggy when I finished this cut!  The piece was quite warm too.

In between showers...


I was able to get out between showers and do some planting.  We went to TSC and picked up some grass seed and a couple of spearmint plants (amongst other things).  I planted some grass seed in the front yard where I need to do more landscaping.  I figure it is going to be awhile before I get to the re-grading and fill so I had better get some grass growing here.  In fact, that was my plan last year as well, and I did plant grass here last year, but this soil is so poor!  Also, I added some fill here too last year and ran the tractor over it a bit too much for the grass I had planted there to survive.  Anyway, I planted some more!  I actually raked it in a bit this time too, so the birds don't eat it all and so it doesn't wash away (as easily).  I need to plant more in several places on the farm, but this is all I could get too.


We got 7/10ths of an inch!  Yay!  We needed it bad - the new trees need water!

I was supposed to pick up a couple spearmint plants from mom on the way up this weekend, but she was not home.  So I picked up a couple of plants at Mile Level in Bedford.  They were $2 a pot.  I decided to plant them down in the wet area near the old elderberry bushes.  Spearmint, if it takes hold, can spread quite invasively!  I am hoping this stuff does well here.  To be sure though, i will pick up the stuff that mom has and try it in another location.  Also, I have a bunch of little spearmint plants started from seed down at the city house.    If they little plants do well i will also spread them around - probably start some down in the city house yard too.


Stare of the garden report:


The front garden is the only one with anything in it yet.  I do see good growth though.  the onions are definitely showing signs now.  


Onions showing their tops!


Potatoes looking good

Strawberries taking hold!

The city raised beds

To be fair to the city house, the raised beds are doing quite well - only kale and potatoes planted here so far though.  It's obviously a bit warmer here!  Those potatoes are getting large!


Except for a couple that the squirrels keep harassing!

Kale and collard greens.  These will need thinning soon.

Sunday, April 24, 2016

Spring caretaking on the farm.


First off - an old friend!

When we got to the farm late Friday, we found a big black snake in the driveway!  I don't know if this is the same guy that has frequented the household area for the past 5 years, but I prefer to think that it is.  He was slithering out from around the woodshed where the chipmunks hang out!  Maybe he got a few?    He can have them!


Maybe 3-4ft long

They say as long as you see a blacksnake around then you shouldn't have any rattle snakes!  Of course, I think I did see a blacksnake the year I found 2 rattlesnakes ... 


Cleaning out the tree-protectors - checking the trees


I got to the farm late Friday, but with still enough time for me to get some lawn mowing in!  Dusty, is the word I would use.  Definitely dusty.  Not much rain lately has made the place a real dust bowl.   I didn't get a lot mowed before the rain came (yippie) - what little we got (boo!).  I think that was when i moved the old ornamental trees out from the cherry tree stand too.  Just 3 small trees.  I can't remember the types.  I positioned them just about 20 ft from the upper edge of the persimmons trees. I tried to make a straight line and keep everything looking aligned - lol.


3 ornamental trees moved from the cherry tree area

Kept them up the hill a bit from the persimmons.

I took off their plastic tree-protectors and then put those metal cages around them.  I think those plastic protectors encourage disease!  Also, while cleaning them up I found 2 dead blue-birds in one! Damn bird nets come off easily in the wind I guess and then birds get trapped an die in those tubes!
I am not sure if I will use the tubes anymore.  I haven't decided yet.  They do seem to protect the trees from deer and maybe some from the weather.


Paw-paw patch cleanup


I used the acetylene torch to cut off the ground post that I couldn't pull out near the fenceline.  After that was out I removed a trailer load of rocks from the fenceline and then mowed over the area to try to even things up a bit.   It looks much better now.  I am close to putting up the fence.  Not sure how I want to orient things yet.
About ready to till.  I wont till until I get something to plant there though.  I have 50 sweet potatoes on order for this patch!

You can easily see the section I chopped off of this patch.  It is usually full of water by this time of year - but this year is so dry!

Plenty of debris can be seen in those paw-paw tree-protectors.  Maybe next time I will clean those out and put metal cages around the paw-paws?

I guess I will need to throw some grass seed on the old section to keep the mud down.


Forsythia cleanup!


I finally got to cleaning up the forsythia!  It was a lot of work with the weedwacker and just on my hands and knees pulling out weeds and fiddling around with the plants.   I found that only 2 had died, which wasn't too bad considering the weather last year and so far this year.  Some are still a bit small, but i remember that some of these were just the barest pieces of root when I put them in.  I am hopeful that this year they will get a good hold on things!

I wasn't able to plant anymore this year and now its a bit late to transplant them.  I still might do some more, but I doubt it.


Yep, there are some forsythia there!  Look close!

I marked the one dead one with a yellow flag - which you can see here if you look closely.  The other dead one was at the top of the hill in the dry rocky soil.

These were the "late" transplants from last spring.  Most survived, but they are small.


Most of these first transplants look quite good.  They were transplanted early last spring.


Status of the road-side front garden


Just a quick review - the road-side front garden is fully planted as of last weekend.  I found that the Strawberries were looking good, but also that the garlic was well up and that some of the potatoes are peaking through!  No sign of the onions yet, but they have only been in there a week.  I should get at it and put some sawdust or woodchips around the garlic and strawberries soon - before the weeds get a good foothold!

Strawberries looking good!

Even see the garlic up!  Look close - its in center of pic and about 2-3 inches up.

Potatoe sign!


Potatoes peaking through!

Just a general picture of the whole garden.


Hazelnuts cleaned and caged!


I cleaned the plastic tubes off of the hazelnuts and made some metal cages for them.  I used mom's old fiberglass electric fence posts - UGH!  Even wearing gloves and being careful not to touch them too much I got tons of the crap on me!  Anyway, with the metal cages these should be safe from the deer.

They are hard to see in the pictures, but the hazelnuts are doing quite well!

Out of the 10 I planted, 9 of them survived!  They came in a seedling pack of 5 each type.  4 of one type survived, all 5 of the other type made it through.  

If we get some decent weather maybe these all can get a good foothold before next winter.


Lots  of mowing - 2nd mowing of the year!


I got right into mowing when I got there Friday - thanks goodness!  Otherwise I wouldn't have had been able to get as much done as I did.  Not everything needed mowing - the front yard was in pretty good shape from last time.  I remain committed to keeping the jungle of trees and junk shrub out of my fields this year.  In that vein of thought I mowed the whole back hill near the black walnut - all the way up to the field!  I could see some of the junk trees and shrubs trying to get a foothold!  Also, this allowed me to plan for where I was going to put the transplanted pine trees.  As I mowed I found that all but 2 of the spruce and pines that I planted last year had died.  So I gathered as many little pine seedlings as I could find near the house area and moved them out onto this steep bank. 


Those are the black walnut trees in the plastic tubes.  They aren't looking great, but I think they are all alive...

Not trees or shrubs yet!

Actually, considering the crap growing here - this mowed area looks ok!

Looking back along the old fence line

Black walnut trees

Nice panorama picture of the back hill


Mowed around the elderberries

Long range view of the elderberry region

The little yellow flags mark the existing pine trees.  12 flags in all.  2 for past survivors and 10 for new transplants.
Some of the new trees!

Very small tree - but they often seem to fair better than the larger transplants

One of the old survivor trees
I actually watered in the transplants because its just been so dry!

Random pictures from around the farm


Panorama shot of  the "big" garden, the orchard, and vineyard

I trimmed the blackberries.  Quite a few of them didn't make it through the winter.  I am debating putting some sawdust on them to help curb the weeds and maybe provide some nutrients and moisture retention?.

Looking up the hill from the back "sheep" area

New transplanted elderberries are sprouting nicely!

This elderberry found some water somewhere!

Little sheep!

Aren't they cute?

This tree scares me!

It is in the sheep pasture, but when it falls - it will land in my field - hopefully not while I am there!

Apple blossoms!


Crab-apple with some kinda disease - I am going to try to use sulfur on it to see if it brings the fungus under control.  I blame this wide spread fungus on keeping the tree in those plastic tubes too long!

This is the same tree as above!  Not many leaves, but plenty of blooms!


The marquis (white) grape plants arent looking great.  But I did find life in at least two of them!


New sprouts from the bottom!  Mom has offered to give me some of the Steuben grapes she has to replace the marquis.  I might take her up on it!

The concord grapes, shown here, were planted at the same time as the marquis!  These plants are really growing nicely!  

Peach blossom!

Pears are blooming!  Actually, they are almost done blooming I think


Orchard showing the vineyard in the back there.  I mowed the orchard again this weekend.  I almost skipped it!

The apple orchard.  See all the grass clippings on the ground there between the trees?  I might use the vacuum attachment and pull these up next time.


Toolpost grinder wheel dressing and general setup test


I have been gathering stuff off of ebay and various mail order places to equip my toolpost grinder for operation.  I was able to pop a new grinding wheel on the arbor and used a new belt on the pulleys.  She spun up fine so I went ahead and checked out what I had in the way of diamond dressing posts.  I had ordered a set from ebay from someones old junk drawer I think.  It was cheap and included 2 holders and 4 (5?) diamond points - one of the points was brand new never been used!  I mounted one of the holders in the 4-jaw chuck and switched it to back gear mode (without engaging the backgears - this essentially locks the head).  Then I aligned the grinding wheel and started then grinder.  Using the hand feed I moved the carriage across the diamond after adjusting to take very very light "cuts".  I think 10/1000's of an inch at a time is plenty - although it might vary my wheel type.  I took a number of passes - I figure I took off about 50/1000's of an inch to get the wheel true and nicely dressed.  I guess you probably should dress the wheel whenever you use it to be sure its truly centered and "clean".

Blurry picture of the grinder as it sits in its box.   I got some of my supplies (belt and various grinding wheels) from McMaster-Carr - they got the stuff and they are SUPER fast!  They made 2 belts and shipped them to me overnight!  I didn't pay overnight shipping - its just that I am lucky enough to be in a location near where they ship from.